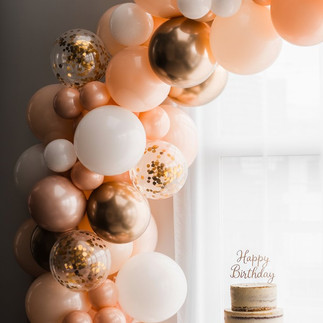
How to Make a Balloon Arch Step-by-Step
- Zissy
- May 19
- 2 min read
Creating a stunning balloon arch might look tricky, but it’s easier than you think! Whether you’re celebrating a birthday, bridal shower, or any special event, a DIY balloon arch will instantly elevate your decor. Let’s walk through each step to make a Pinterest-worthy balloon arch that will have everyone snapping pics.

Supplies You’ll Need:
Balloons in different sizes and colors (choose a cohesive theme)
Balloon pump or electric inflater
Balloon arch kit (frame, tape, or fishing line)
Command hooks or tape for securing the arch
Scissors and/or wire cutters
Optional: Sandbags or balloon weights
Step 1: Choose Your Colors and Theme
Start by choosing a color scheme that matches your event. Want a chic, minimalist look? Go for neutrals and metallics. Throwing a kid’s birthday party? Opt for bright, playful colors. Mix in a few foil or confetti-filled balloons for extra pop!
Step 2: Inflate the Balloons
Use a balloon pump to inflate your balloons. Vary the sizes for a more dynamic look. Pro tip: Keep the balloons slightly underinflated to avoid popping. Tie them off securely and set them aside.
Step 3: Assemble the Frame
Set up your arch frame according to the kit instructions. If you’re using PVC pipes or wire, secure it firmly so it doesn’t wobble. For a freestanding arch, use sandbags or balloon weights to anchor the base.
Step 4: Attach Balloons to the Frame
Using balloon tape or fishing line, start attaching balloons in clusters. Alternate colors and sizes to create dimension. Keep stepping back to see how it looks overall. Fill any gaps with smaller balloons to keep the arch looking full and balanced.
Step 5: Add Decorative Touches
This is where you can get creative. Add greenery, flowers, or tassels for texture. Fairy lights add a magical touch for evening events. For a glam look, incorporate a few metallic balloons.
Step 6: Secure the Arch and Adjust
Carefully move the arch to its final location. Secure it with command hooks or tape as needed. Make any last-minute adjustments to balloon placement and step back to admire your work.
Step 7: Snap & Share Your Creation!
Once your balloon arch is complete, snap some photos for Pinterest! Share your creation, tag us, and inspire others to try their own DIY balloon arches.
Ready to make your party pop? Start crafting and watch your space come to life!
READ MORE:


Comments